
Interior basement waterproofing for an Oakville home can make sense when recurring seepage can be collected along the inside foundation perimeter and sent to a confirmed sump or other suitable drainage route. It is not a universal answer to every damp wall, puddle, window leak, sewer backup, or sump problem. The useful first step is to document where water appears and when it happens, then match the work to the route rather than choosing a system from a photo.
At Oakville Basement Waterproofing, we plan interior basement waterproofing around the visible pattern, the basement’s access conditions, existing drainage, and the destination for collected water. That approach matters because water can travel behind finishes, along the wall-floor joint, or beneath flooring before it becomes visible.
What interior basement waterproofing is designed to manage
An interior approach generally manages water after it reaches the inner side of the foundation area. When the property conditions support it, the planned system can include a controlled opening along the slab edge, a perimeter drainage channel, suitable wall treatment, and a connection to a sump or approved outlet. The floor edge is then reinstated after the necessary connections and inspection steps are complete.
The purpose is not simply to cover a wet wall. It is to collect water at the interior perimeter and give it a defined route away from that area. For that reason, the drainage destination is as important as the channel itself. An existing pump, visible pipe, or floor drain does not automatically confirm that the route is adequate or approved for new work.
Interior work can be practical where outside excavation is constrained by features such as paving, decks, landscaping, property limits, or nearby structures. It still requires access inside the basement and may involve dust, noise, selective removal of finishes, and later restoration.
Signs an interior approach may be worth assessing
A recurring pattern is more useful than a single wet spot. Interior perimeter collection may become a relevant option when water repeatedly appears at the slab edge, lower wall area, or behind lower wall finishes during rain, prolonged wet weather, or thaw conditions.
- A wet line or small puddles form where the basement wall meets the floor.
- Lower drywall, baseboards, insulation, or flooring show moisture or staining.
- Water appears after rain but the original entry point is concealed by finishes.
- Exterior excavation would have significant access or restoration constraints.
- Collected foundation water needs a planned connection to a sump system or another confirmed drainage route.
These observations do not prove that an interior system is the right repair. A visible wall crack may need a focused assessment of the crack. A below-grade window with standing water may point to window well drainage and repair. Water rising through a floor drain or plumbing fixture needs a different investigation from foundation seepage.
Why the first puddle is not always the source
Water follows gravity and available paths. It can enter higher on a wall, move behind drywall, travel along a joint, or collect beneath flooring before appearing at a low point. This is why the largest puddle should be treated as evidence, not a conclusion.
A sound review compares the water pattern with visible foundation details, cracks, penetrations, windows, floor drains, sump equipment, and accessible exterior conditions such as grading, roof discharge, paving, and window wells. It should also separate what can be confirmed from what is still concealed or requires further testing.
More than one condition can exist at the same time. For example, a property might have rain-related seepage near a wall-floor joint and a separate sump discharge concern. A repair should state which route it is intended to manage and what remains outside its scope.
How interior waterproofing differs from exterior work
Interior and exterior waterproofing manage water on different sides of the foundation. Neither is automatically better. The right comparison starts with the suspected route, access on both sides of the wall, drainage connections, and the restoration each method requires.
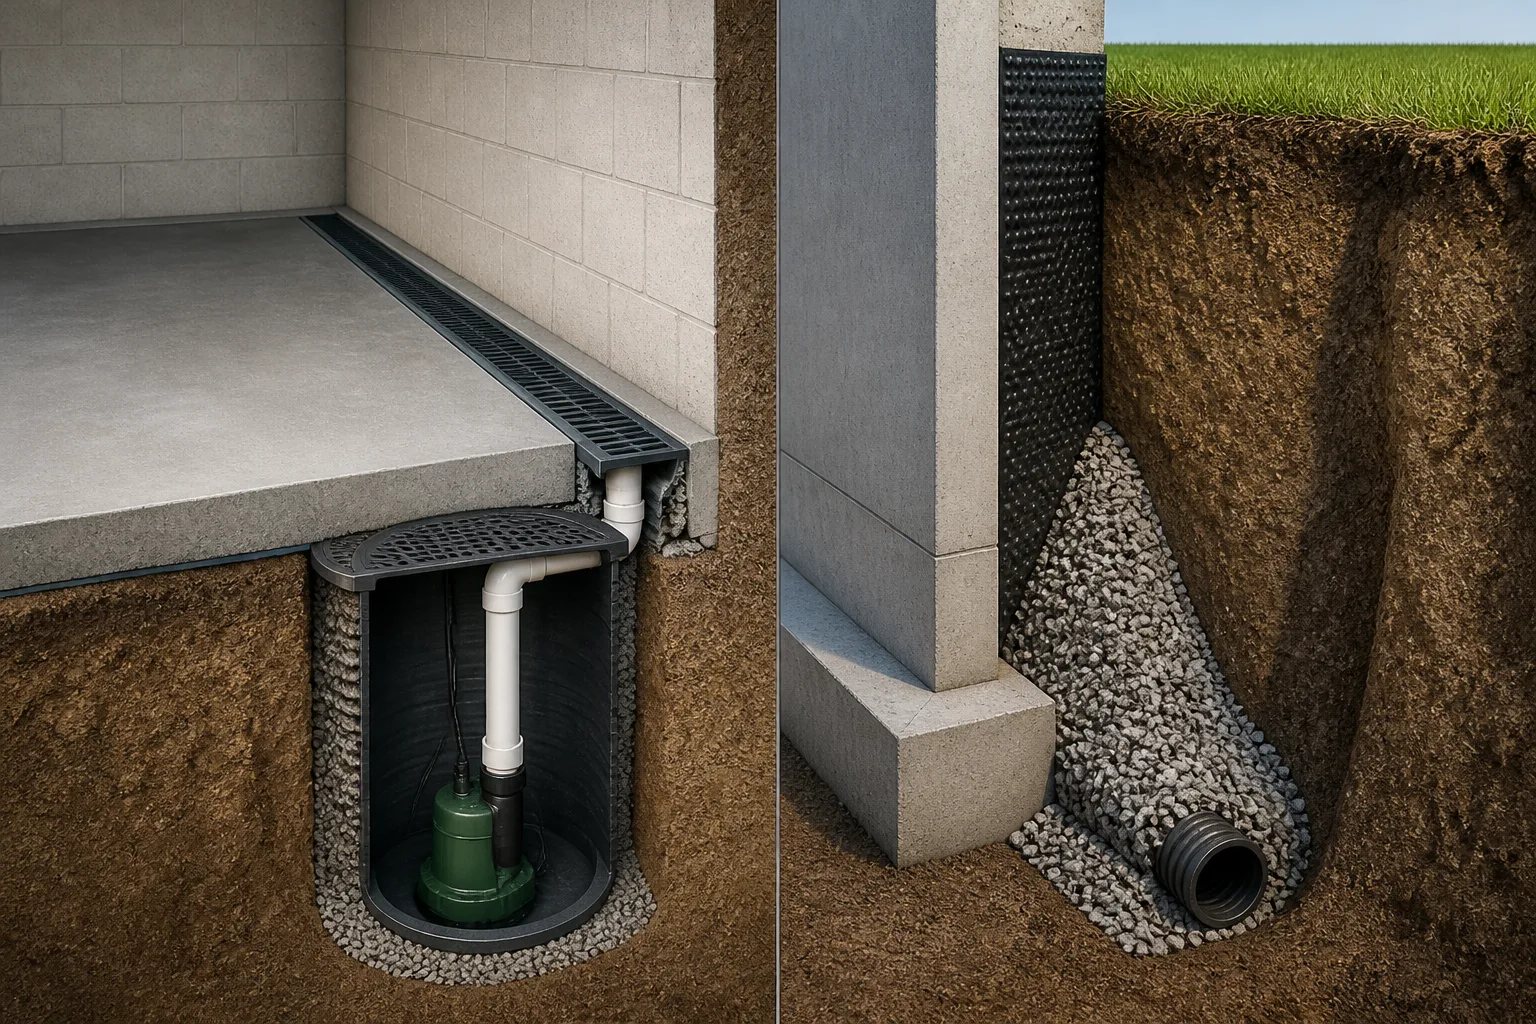
| Planning question | Interior approach | Exterior approach |
|---|---|---|
| Where water is managed | Along the inside foundation perimeter, directed to a suitable route. | From the soil side of the foundation wall and near the footing drainage area. |
| Typical access | Slab edge and lower wall finishes inside the basement. | Excavation beside the foundation. |
| Primary disruption | Interior dust, noise, contents handling, and finish restoration. | Soil, paving, landscaping, steps, decks, and other exterior restoration. |
| Key planning question | Where will collected water go? | What wall, drain, and surface restoration work is included? |
Exterior work can allow direct access to the outside wall and buried drainage, while interior work can avoid full exterior excavation. Both methods depend on a credible destination for water and a clear written scope. Our interior vs exterior waterproofing guide explains the access, drainage, and restoration differences in greater detail.
What to document before an assessment
Clear observations help distinguish a recurring route from an early guess. If it is safe to do so, note the first place that became wet before cleanup or moving stored items. Wider photos that show the wall, floor edge, window, drain, or equipment in context are often more useful than a close-up alone.
Before an assessment
Record the details that reveal the water pattern
Use plain observations. You do not need to diagnose the cause before contacting us.
- Note the first location where water, dampness, or staining appeared.
- Record the date, duration, and whether rain, thaw, an outage, or plumbing use occurred.
- Photograph visible conditions safely, including a wider view for context.
- List known sump pumps, drains, window wells, alarms, and previous repairs.
- Identify drywall, flooring, storage, cabinetry, or exterior features that limit access.
- Gather any available permits, drainage records, and earlier repair documents.
Do not touch electrical equipment or enter standing water to gather more information. If water may be contaminated, or electrical safety is a concern, prioritize safe response and cleanup over documentation.
Access and restoration deserve equal attention
In an unfinished basement, the floor edge, lower walls, pipes, and equipment may be easier to review. In a finished space, drywall, insulation, flooring, cabinetry, and baseboards can conceal the route and create restoration work. Selective access should answer a defined question rather than lead to broad demolition without a plan.
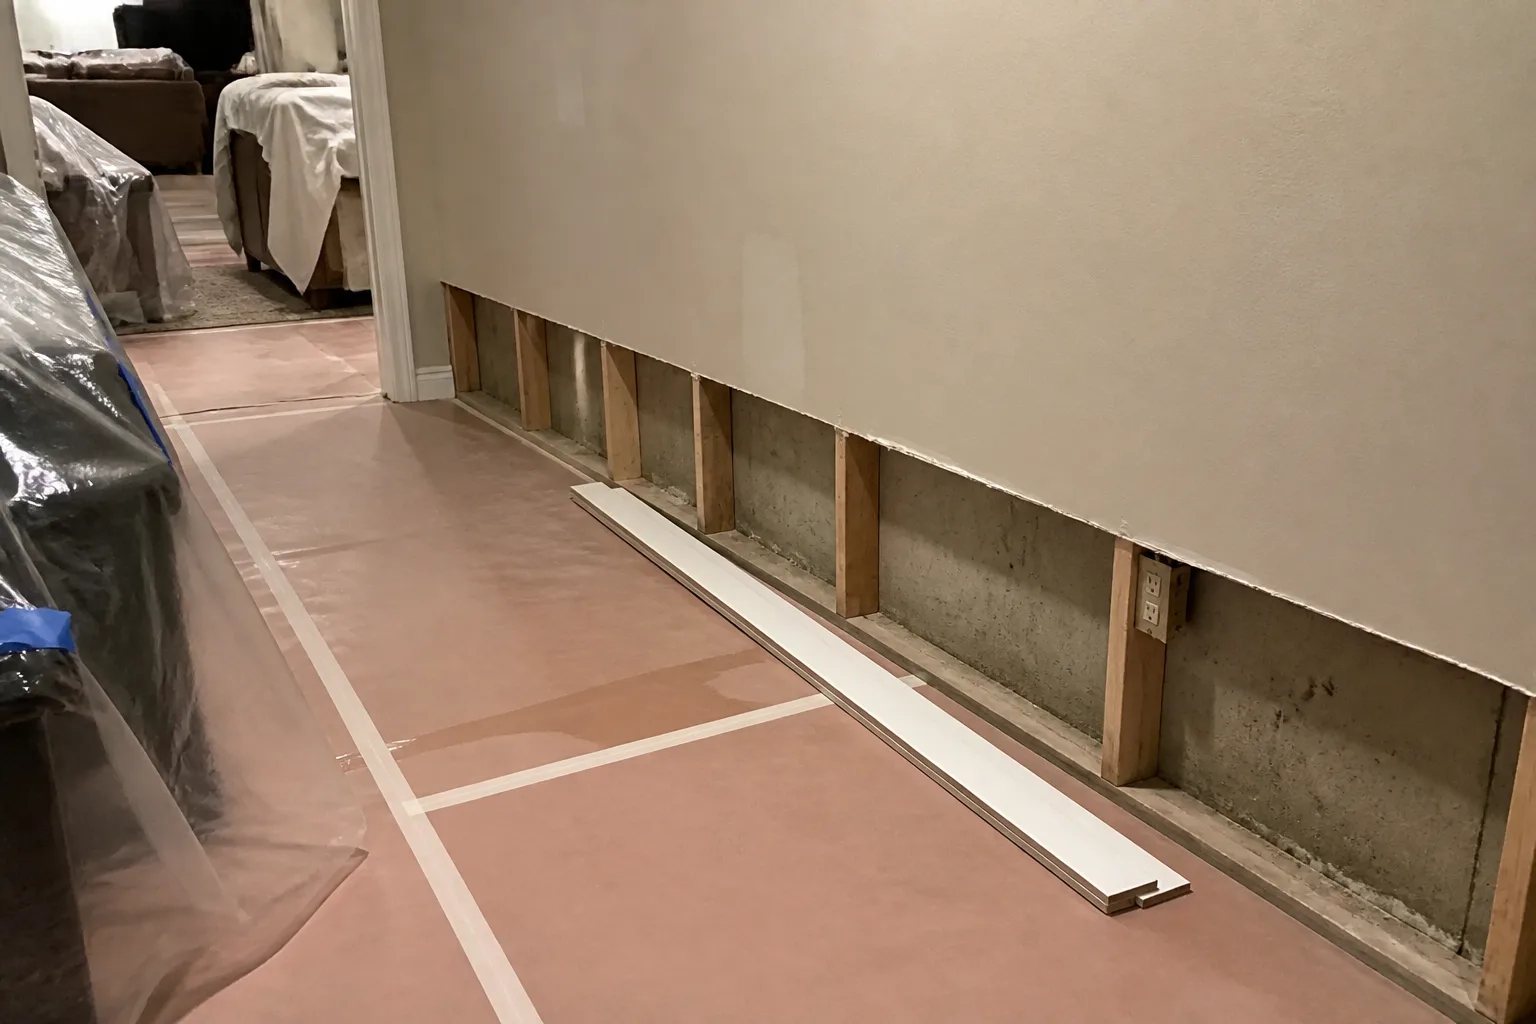
Before authorizing a scope, clarify which finishes need to be removed, who protects occupied areas and contents, what debris handling is included, and who reinstates each disturbed finish. The proposal should also identify the affected length, drainage connection, sump equipment if applicable, disposal, and any assumptions that could change after concealed areas are opened.
Permits, drainage destinations, and records in Oakville
Oakville planning note
A sump or weeping-tile change can have permit implications
Permit requirements follow the final scope, not the general term “waterproofing.” Confirm current Town of Oakville requirements, especially where sump, weeping-tile, excavation, shoring, sewer, or site-servicing work is involved.
Permit requirements depend on the actual scope. The Town of Oakville identifies sump-pump work and weeping-tile repairs or changes on properties in the Foundation Drainage Collection System area among work that can require a permit. Excavation, shoring, sewer-system work, and site servicing can also have separate approval requirements. Ordinary damp-proofing is treated differently, so the final work should be checked against current municipal requirements before it begins.
Where a sump or weeping-tile change is being considered, do not infer a property’s drainage arrangement from its neighbourhood or age. Confirm available records, accessible components, and the proposed discharge route. Collected water should not be redirected toward the foundation, a neighbouring property, or an unapproved connection.
Keep the assessment, proposal, approved changes, invoices, permits, inspection records, photographs, and product information with the property file. These records are useful if the basement is renovated later, equipment is replaced, or a future water event needs to be compared with the original condition.
Questions that make proposals easier to compare
Two estimates are only comparable when they solve the same route and include the same responsibilities. A lower initial figure may reflect a shorter length, different access assumptions, no drainage connection, or excluded restoration.
- What evidence connects the proposed interior scope to the observed water route?
- Which conditions are confirmed, and which are assumptions that require access or testing?
- Where will the collected water discharge, and how was that destination confirmed?
- What length of slab edge and wall area will be opened?
- Which finishes, utilities, contents, and restoration tasks are included or excluded?
- Which permits, inspections, or drainage confirmations apply to this scope?
- How will an unexpected concealed condition be documented and authorized?
Interior basement waterproofing is most effective as part of a defined water-management plan, not as a label applied to every basement moisture problem. Start with the first visible location, timing, drainage context, and access limits. From there, the right scope may be a perimeter system, a targeted leak repair, exterior work, window well correction, sump work, or another measure matched to the evidence.
Helpful answers
Frequently Asked Questions
Clarify the water route before choosing a repair
Tell us where water appears, when it occurs, and what drainage or pump equipment is already present so we can confirm the appropriate assessment scope.